Invite a user
Invite colleagues, clients or your accountant to your billing account so they can work in your organisations. Each invitation is tied to one email address and, optionally, to specific organisations.
Before you begin
- You need the Admin or Owner billing-account role, on an account with an active plan (an expired trial must be renewed first).
- Check your seat usage — you cannot invite more people than your plan allows. If you are at the limit, deactivate a member or upgrade your plan first.
Open the invitations page from Settings → Billing account → Invitations, or select Invite User on the Account Overview or Invite Member on the Members & Seats page.
Send an invitation
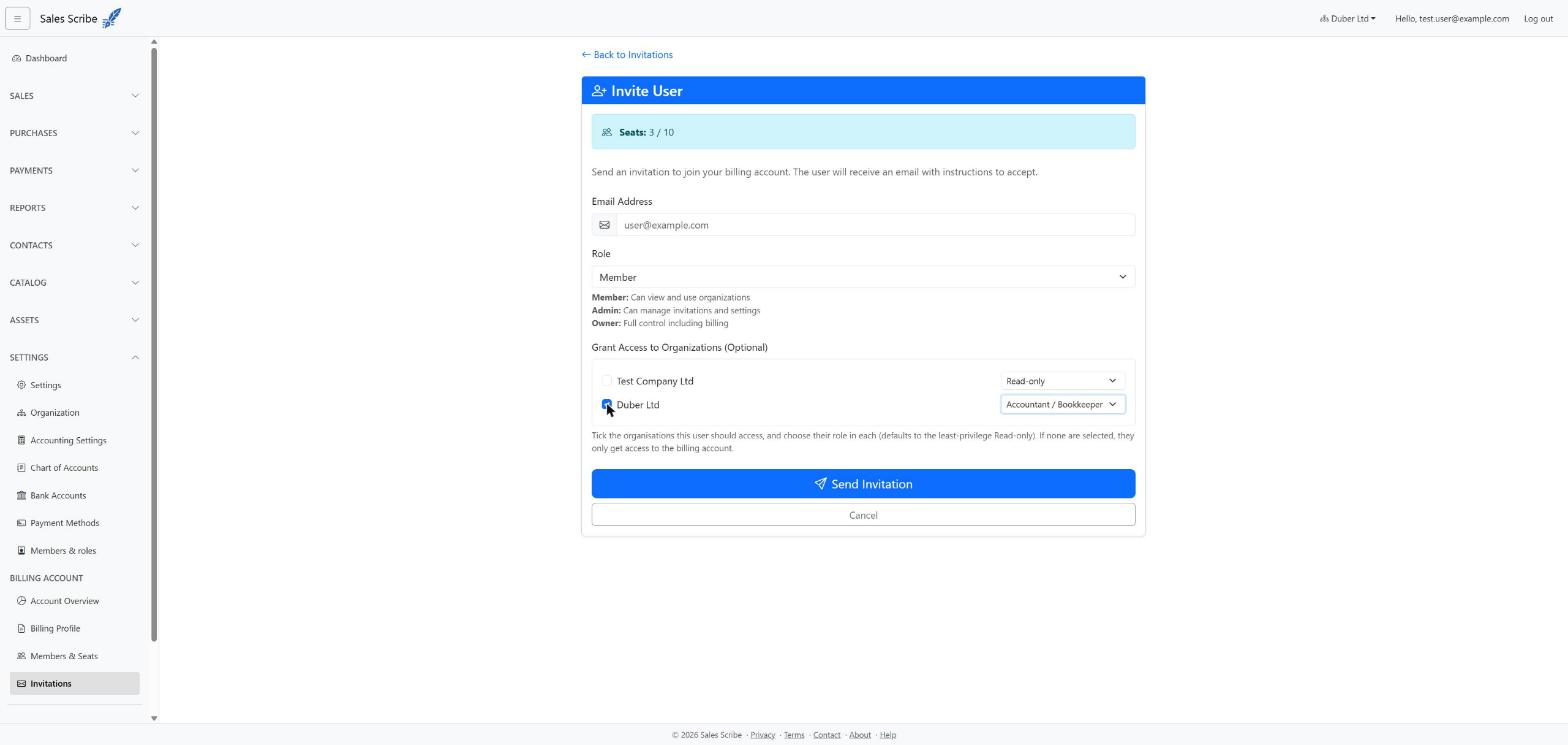
- On the Invitations page, select Invite User.
- Enter the person's Email address.
- Choose their Role for the billing account. The form explains each choice:
- Member — Can view and use organizations.
- Admin — Can manage invitations and settings.
- Owner — Full control including billing.
- Under Grant Access to Organizations (Optional), tick any organisations they should be able to work in, and for each one choose their organisation role — the level of access they will have inside that organisation. New members default to Read-only; choose a higher role (Sales, Accountant, Finance, Administrator or Owner) if they need it and you have the access to grant it. See Organisation roles and permissions. If you tick none, they join the billing account only and can be given organisation access later.
- Select Send Invitation.
Share the one-time link
After sending, the Invitation Sent page appears with the Invitation Link.
Warning: This link is shown only once. Copy it now with the Copy button and keep it safe if you want to pass it on yourself.
Two things happen:
- The invited person is emailed an invitation with instructions to accept.
- The same link is shown on this page for you to copy and share directly if you prefer.
The link expires in 7 days. From here you can View All Invitations or Invite Another User.
Invitation statuses
Each invitation on the list shows its status:
stateDiagram-v2
    [*] --> Pending: invitation sent
    Pending --> Accepted: user accepts
    Pending --> Revoked: you revoke it
    Pending --> Expired: 7 days pass
- Pending — sent but not yet accepted.
- Accepted — the person has joined (shown with the date).
- Revoked — you cancelled it before it was accepted.
- Expired — it was not accepted within 7 days.
Revoke an invitation
To cancel a pending invitation — for example if you sent it to the wrong address, or you want to issue a fresh link:
- Open Invitations.
- Find the pending invitation and select Revoke.
- Confirm.
Revoking invalidates the old link. To invite the person again, send a new invitation, which produces a new one-time link.
Troubleshooting
- The Invite User button is missing or I get an "access denied" message. You need the Admin or Owner role on a usable (non-expired) account.
- I've hit my seat limit. Free a seat by deactivating a member, or upgrade your plan, then invite again.
- The person lost the link / it expired. Revoke the old invitation (if still pending) and send a new one.
- I sent too many at once and was asked to wait. There is a limit on how many invitations can be created in a short time. Wait a little and try again.